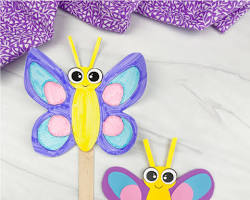
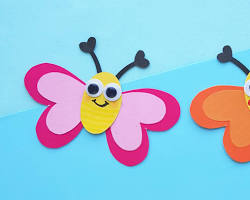
Butterflies are a symbol of spring, transformation, and beauty, making them a popular theme for children’s crafts.
But why settle for a static butterfly picture when you can create one that flaps its wings just like the real thing? Flapping butterfly crafts add a touch of magic and engineering to art time, engaging kids in the creative process while introducing them to basic physics.
This collection offers 20 flapping butterfly crafts for kids of all ages and skill levels.
From simple paper crafts to more intricate projects using recycled materials, you’re sure to find the perfect craft to spark your child’s imagination and get those tiny hands busy!
Easy Flapping Butterflies (Great for Younger Kids):
Straw and Paper Butterflies:

This classic is a great introduction to flapping crafts. Use construction paper or cardstock to cut out butterfly shapes. Decorate them with markers, crayons, or stickers. Then, use a pipe cleaner or straw as the body and secure two smaller straws on either side with tape to create moving wings.
Fingerprint Flutterers:
This adorable craft is perfect for toddlers. Dip little fingers in paint and decorate a piece of cardstock to create the butterfly body. While the paint is still wet, fold another piece of cardstock in half and press it down to create symmetrical butterfly wings. Let everything dry, then attach a pipe cleaner body and wiggle the wings!
Coffee Filter Butterflies:

Coffee filters are readily available and their circular shape makes them perfect for quick and easy butterfly crafts. Decorate coffee filters with markers, paints, or even tissue paper squares. Scrunch the decorated filter in the middle to create the body and secure a pipe cleaner or straw in the center. Pinch the pipe cleaner at the top to create antennae.
Egg Carton Butterflies:
Recycle egg cartons by cutting out individual egg cups. Decorate them with paint, markers, or even glitter. Poke a hole in the top of the “cup” and thread a pipe cleaner through it. Cut the pipe cleaner in half and bend the ends down to create antennae. Decorate the pipe cleaner for the body with googly eyes or beads.
Spoon Butterflies:
Plastic spoons are another great upcycled material. Paint the bowl of the spoon and the handle for the body. Decorate the bowl with markers or glitter for patterns. Cut out two large wings from construction paper or felt and attach them to the back of the spoon with glue or tape.
Flapping Fun with a Twist (For Older Kids):
Popsicle Stick Puppets:

Take the classic popsicle stick puppet to a new level with flapping wings! Cut out butterfly shapes from construction paper or felt. Decorate them with markers, glitter, or buttons. Glue popsicle sticks to the underside of the wings, leaving a small space at the top for movement. Attach the decorated popsicle sticks to another popsicle stick for the body and control rod.
Springle Surprise:

This craft combines the fun of flapping wings with a pop-up surprise! Cut out two large butterfly wings from construction paper or felt. Decorate them as desired. Cut a smaller butterfly shape from cardstock and decorate it with a fun surprise message or picture. Attach a spring (available at craft stores) to the surprise piece and secure it to the center of one of the large wings. Glue the decorated wings together, leaving the spring mechanism free to move.
Bouncy Button Butterflies:
This craft combines the beauty of butterflies with the classic fun of button toys. Cut out butterfly shapes from felt or sturdy fabric. Decorate them with buttons, sequins, or other embellishments. Sew two large buttons onto the back of one wing, leaving a small space between them. Sew another large button onto the center of the other wing. Thread a pipe cleaner through the spaces between the buttons on both wings, creating a seesaw mechanism that allows the wings to flap up and down.
Paper Plate Parade:
Paper plates are another fantastic recycled material for crafts. Cut a paper plate in half to create two semi-circles. Decorate them with paints, markers, or collage materials to create beautiful butterfly wings. Punch a hole in the center of each wing and thread a pipe cleaner through them. Decorate the pipe cleaner for the body with googly eyes and felt antennae.
Leaf Lanterns:
This craft is a beautiful way to combine nature and creativity. Collect large, flat leaves (such as oak or maple leaves) that are still slightly flexible. Decorate them with paint markers or fabric paint. Use a hole punch to create holes along the center fold of the leaf. Cut out two small butterfly shapes from construction paper or felt and decorate them. Thread pipe cleaners through the holes in the leaf, sandwiching the butterfly shapes in between to create the body and wings.
Cardboard Capers:
Cardboard tubes from toilet paper or paper towels are perfect for creating 3D butterflies. Cut the tube in half to create two sections. Decorate them with construction paper, paint, or fabric scraps. Cut out two butterfly wing shapes from cardstock or felt and decorate them. Carefully slot one decorated wing into each end of the cardboard tube sections. Use a brad fastener (available at craft stores) to connect the two tube sections in the center, allowing the wings to flap freely.
Paperclip Paragliders:
This craft incorporates a fun science lesson! Cut out large butterfly wings from construction paper or thin plastic sheets. Decorate them with markers or stickers. Using a paperclip, create a small loop at the top center of each wing. Thread a pipe cleaner through the loops, leaving a small space for movement. Experiment with the angle of the paperclip “attachments” to see how it affects the way the butterfly “glides” when dropped.
Straw Rockets:
This project combines the wonder of butterflies with the excitement of a mini-rocket! Cut out large butterfly wings from construction paper or felt. Decorate them with markers or glitter. Cut a drinking straw in half. Tape one end of each straw half to the underside of a wing, leaving a small space for movement. Secure the decorated wings to a construction paper body with a brad fastener. Wrap a rubber band tightly around the other end of each straw half (the end closest to the wings). On a flat surface, pull back on the rubber bands and release to send your butterfly “rocketing” forward!
Pattern Play:
This craft encourages creativity and pattern recognition. Cut out several identical butterfly wing shapes from cardstock or felt in different colors or patterns. Decorate them with additional patterns or shapes using markers, paint, or buttons. Punch a hole near the top center of each wing. Lay out the wings in different combinations and thread pipe cleaners through the holes to create unique and colorful butterflies with “surprise” wing patterns.
Fluttery Fashion:
Take butterfly crafts to a whole new level by creating a wearable butterfly mask or wings! Use felt or fabric scraps to cut out large butterfly wing shapes. Decorate them with paints, markers, sequins, or even feathers. For a mask, attach the wings to a pipe cleaner headband that fits comfortably around the head. For wings, attach the decorated wings to a backpack or shirt using safety pins or velcro.
pcycled Adventures (Crafts with Recycled Materials):
Newspaper Butterflies:
Give old newspapers a new life! Cut out large butterfly wing shapes from several sheets of newspaper. Overlap the layers for a textured effect. Decorate with paint markers or acrylic paint. Secure the decorated wings to a pipe cleaner body with tape or glue.
Milk Carton Metamorphosis:
This craft is a fun way to upcycle milk cartons. Cut the top third of a milk carton off and flatten it. This will be the butterfly body. Decorate it with paint or markers. Cut out two butterfly wing shapes from construction paper or felt and decorate them. Attach the wings to the milk carton body with glue or brads. Decorate the pipe cleaner for the body with googly eyes and felt antennae.
CD Butterflies:
Repurpose old CDs into dazzling butterfly wings! Carefully cover the shiny side of the CD with colorful tissue paper squares. Overlap the squares to create a stained glass effect. Cut out a butterfly body shape from construction paper or felt and decorate it. Secure the decorated body to the center of the CD with glue. Decorate the pipe cleaner for the body with googly eyes and felt antennae.
Bottle Cap Beauties:
Collect colorful bottle caps to create a unique and vibrant butterfly craft! Glue bottle caps together in a row to create the butterfly body. Decorate the bottle caps with paint markers or stickers. Cut out two butterfly wing shapes from construction paper or felt and decorate them. Attach the wings to the bottle cap body with glue or brads.
Feathery Friends:
Give your butterfly crafts a touch of elegance with feathers! Cut out butterfly body shapes from felt or sturdy fabric. Decorate them with buttons, sequins, or other embellishments. Glue feathers of various sizes and colors onto the felt body to create beautiful wings. Attach a pipe cleaner or straw to the back of the body for a hanger or use it to create a butterfly mobile.
These are just a few ideas to get you started! With a little creativity and these handy tips, you and your kids can create a whole world of beautiful and captivating flapping butterfly crafts.
