Transport your kids to the fascinating world of Ancient Egypt with these engaging craft projects!
Designed for various ages and skill levels, these activities will spark their creativity and introduce them to the rich history of this remarkable civilization.
As they build pyramids, craft mummies, and design hieroglyphic jewelry, they’ll be learning about pharaohs, gods, and the daily lives of the Egyptians.
Majestic Pyramids (Easy):

The pyramids are iconic symbols of Ancient Egypt. Replicate their grandeur with this simple craft.
- Materials: Cardboard, paint, paintbrushes, glue (optional).
- Instructions: Cut four identical triangles from cardboard. Glue them together at the edges to form a pyramid shape. Paint the pyramid with gold, yellow, or sand-colored paint for a realistic touch.
Unwrap a Mummy (Easy to Medium):

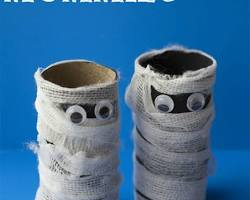
Mummies were an essential part of the Egyptian belief in the afterlife. Create a playful mummy craft with your kids.
- Materials: Paper towel roll, white gauze or toilet paper, googly eyes (optional), markers, scissors.
- Instructions: Wrap the paper towel roll in strips of gauze or toilet paper, leaving a gap for the “face.” Decorate the mummy with marker-drawn bandages and spooky eyes.
Pharaoh Headdress Fit for Royalty (Medium):

Pharaohs wore elaborate headdresses to symbolize their power. Let your child create their own royal headpiece.
- Materials: Construction paper (gold, yellow, blue), headband (plastic or fabric), feathers (optional), glue, scissors, stapler.
- Instructions: Cut out a wide band of gold construction paper to fit the circumference of the headband. Cut out a sun disk shape from yellow paper and a cobra shape from blue paper. Glue the sun disk and cobra onto the gold band. Decorate with feathers for added flair. Staple the ends of the band to secure it onto the headband.
Design Your Own Egyptian God/Goddess (Medium):

The Egyptians worshipped many gods and goddesses. Encourage your child to design their own deity.
- Materials: Construction paper (various colors), markers, crayons, glue, scissors.
- Instructions: Provide construction paper in different colors for the body, clothing, and accessories. Let your child use markers and crayons to draw facial features, clothing, and symbols associated with their chosen god/goddess (e.g., wings for Isis, a staff for Osiris). Glue the pieces together to create their unique deity.
Hieroglyphic Jewelry: Speak the Language of the Pharaohs (Medium):

Hieroglyphs were the writing system of the Ancient Egyptians. Craft jewelry with these fascinating symbols.
- Materials: Air dry clay, craft sticks, beads, string, permanent markers, rolling pin.
- Instructions: Roll out the air dry clay to a desired thickness. Use craft sticks to cut out shapes like squares or triangles. Let your child draw simple hieroglyphs on the clay with permanent markers (research common hieroglyphs online beforehand). Make a small hole at the top of each clay piece before baking according to the clay’s instructions. Once baked and cooled, thread beads and the clay pieces onto string to create a unique hieroglyphic necklace or bracelet.
Nile River Scene in a Box (Medium):

The Nile River was the lifeblood of Ancient Egypt. Create a miniature scene depicting its importance.
- Materials: Shoebox, blue construction paper, green construction paper, brown construction paper, toy animals (crocodile, hippopotamus), small toy boats, craft glue, scissors.
- Instructions: Cut a large rectangle from blue construction paper to represent the Nile River and glue it to the bottom of the shoebox. Glue green construction paper strips on the sides of the box to represent the lush riverbanks. Use brown construction paper to create small pyramids or temples on the edge of the “riverbank.” Arrange toy animals and boats on the blue paper to complete the scene.
Scarab Beetle Box (Medium to Hard):

The scarab beetle was a revered symbol in Ancient Egypt. Craft a decorative box inspired by this fascinating insect.
- Materials: Small wooden box (or cardboard box you can decorate), gold or black paint, paintbrushes, clay or air dry clay, craft sticks.
- Instructions: Paint the box gold or black. Mold the clay into a scarab beetle shape using craft sticks to help define details. Once the clay is baked and cooled (if using air dry clay), glue the scarab beetle onto the lid of the box.
Chariot Race Fun (Easy):

Chariot races were a popular form of entertainment in Ancient Egypt. Create a miniature chariot race scene for playtime.
- Materials: Shoebox lid, construction paper (various colors), cardboard scraps, toy horses (or plastic animal figures), markers, glue, scissors, buttons (optional).
- Instructions: Cover the shoebox lid with construction paper to create the racetrack. Use cardboard scraps to cut out simple chariot shapes. Decorate the chariots with markers and glue on buttons for wheels (optional). Place toy horses or animal figures in the chariots and let the races begin!
Shabti Dolls: Mini Helpers for the Afterlife (Medium):

Shabti dolls were placed in tombs to assist the deceased in the afterlife. Craft your own shabti figures.
- Materials: Air dry clay, craft sticks, markers, buttons (optional).
- Instructions: Roll out the air dry clay to a desired thickness. Cut out simple humanoid shapes with craft sticks. Decorate the figures with markers to resemble clothing and tools (e.g., hoes, baskets). Add buttons for eyes (optional). Let the clay figures dry and hardened completely.
Design a Ushebti Canopic Jar (Medium):

Canopic jars were used to store the organs of the deceased for the afterlife. Create a decorative canopic jar inspired by these ancient containers.
- Materials: Clay pot (or small cardboard box), paint, paintbrushes, markers, pipe cleaners (optional).
- Instructions: Paint the clay pot or cardboard box. Research the four sons of Horus, each associated with a different organ and depicted with a specific animal head (e.g., Imset with a human head). Use markers to draw the animal heads on the painted pot. Bend pipe cleaners into decorative shapes and attach them to the top of the jar for an extra touch.
Linen Fashion Show (Medium):

Linen was a popular fabric in Ancient Egypt. Design and decorate simple tunics or dresses inspired by Egyptian clothing.
- Materials: Large white T-shirts (or bedsheets cut into squares), fabric markers, stencils (optional), scissors (adult supervision required).
- Instructions: Let your child use fabric markers to decorate the plain white fabric with geometric patterns, hieroglyphs, or images inspired by Egyptian art (stencils can be helpful for younger children). With adult supervision, carefully cut armholes and a neckline in the fabric to create a simple tunic or dress.
Make a Fan Fit for a Pharaoh (Medium):

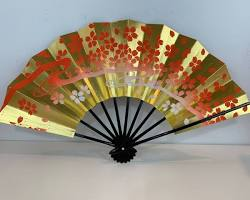
Fans were essential for keeping cool in the hot Egyptian climate. Create a decorative fan inspired by pharaohs.
- Materials: Cardboard, paint, paintbrushes, popsicle sticks, glue, feathers (optional), glitter (optional).
- Instructions: Cut a fan shape from cardboard. Paint the cardboard with vibrant colors or hieroglyphic patterns. Glue a popsicle stick to the back of the fan for holding. Decorate with feathers or glitter for extra flair.
Nile Delta Mobile (Medium):

The Nile Delta, where the Nile River meets the Mediterranean Sea, was a fertile region in Ancient Egypt. Create a mobile showcasing this area.
- Materials: Construction paper (green, blue), string, scissors, hole punch, markers, crayons, stapler (adult supervision required).
- Instructions: Cut out triangles from green construction paper to represent the delta. Cut out various shapes from blue construction paper to represent fish, boats, and birds. Decorate the shapes with markers and crayons. Use a hole punch to make holes in the top of each shape and the corners of the triangles. Cut long pieces of string and tie them to the holes. Staple the strings together at the top to create a mobile structure. Hang your Nile Delta mobile and watch it gently sway.
Make a Colorful Ushebti Box (Medium):

Ushebti boxes were used to house shabti dolls. Craft a decorative box specifically for your shabti figures.
- Materials: Cardboard box, paint, paintbrushes, markers, glitter (optional), jewels (plastic or craft jewels), glue.
- Instructions: Paint the cardboard box with vibrant colors. Decorate the box with markers to add hieroglyphs or Egyptian-inspired patterns. Glue on glitter, plastic jewels, or other embellishments for a touch of sparkle. Once dry, place your shabti dolls inside the box.
Pyramid Treat Boxes (Easy):

These pyramid-shaped boxes are perfect for holding small treats or Egyptian-themed party favors.
- Materials: Construction paper (various colors), scissors, glue, tape (optional).
- Instructions: Cut out four identical triangles from construction paper. Overlap two triangles at the edges and glue them together to form a pyramid shape. Repeat with the remaining two triangles to create another pyramid side. Glue the two pyramid sides together at the base, leaving an opening at the top. Decorate the outside of the pyramid with markers, glitter, or stickers. For a more secure closure, use tape to seal the top opening.
Make a Book of the Dead Replica (Medium to Hard):

The Book of the Dead contained spells and prayers to guide the deceased through the afterlife. Create a replica with your child, focusing on the illustrations.
- Materials: Construction paper (cream, yellow), markers, crayons, stencils (optional), hole punch, string or yarn, scissors.
- Instructions: Use cream-colored construction paper for the pages and yellow for the cover. Decorate the cover with markers or crayons to resemble a papyrus scroll. Research common symbols and hieroglyphs from the Book of the Dead (online resources can help). Let your child use stencils or draw these symbols on the “pages” of the book. Punch holes along the edge of the pages and tie them together with string or yarn to create a simple book.
Design a Sun Disk Necklace (Medium):

The sun disk was a powerful symbol in Ancient Egypt, representing the sun god Ra. Craft a necklace inspired by this symbol.
- Materials: Air dry clay, craft sticks, string, gold or yellow paint, paintbrush.
- Instructions: Roll out the air dry clay to a desired thickness. Use a craft stick to cut out a sun disk shape. Make a small hole at the top of the clay piece before baking according to the clay’s instructions. Once baked and cooled, paint the sun disk gold or yellow. Thread the string through the hole to create a necklace.
Play a Game of Senet (Medium):

Senet was a popular board game played by the ancient Egyptians. While recreating the original game can be complex, you can create a simplified version for your family.
- Materials: Cardboard or poster board, markers, rulers, game pieces (buttons, small toys), dice (optional).
- Instructions: Draw a large grid on the cardboard or poster board. Decorate the squares with alternating colors or simple Egyptian motifs. Research the basic rules of Senet (available online) and explain them to your child in a simplified way. Use buttons, small toys, or other objects as game pieces. You can even create your own dice with hieroglyphs or dots representing numbers (optional).
Royal Cartouche Craft (Medium):

Cartouches were oval shapes enclosing the names of pharaohs. Design your own personalized cartouche.
- Materials: Cardboard, gold or yellow paint, paintbrush, markers, jewels (plastic or craft jewels), glue.
- Instructions: Cut out an oval shape from cardboard. Paint the cardboard gold or yellow. Research your child’s name written in hieroglyphs (online resources can help) or let them create their own “royal” name. Use markers to write the name inside the oval. Decorate the cartouche with glue-on jewels or other embellishments fit for a pharaoh.
Make a Colorful Scarab Bead Necklace (Medium):

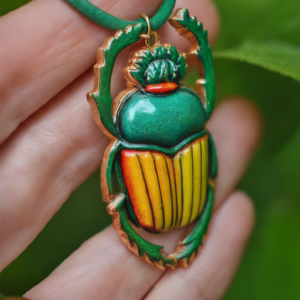
Scarab beetles were a symbol of rebirth in Ancient Egypt. Create a vibrant necklace featuring these fascinating creatures.
- Materials: Polymer clay (various colors), craft knife (adult supervision required), sandpaper (adult supervision required), baking sheet, parchment paper (optional), string or yarn, beads (optional).
- Instructions: (Adult to help with cutting and baking) Divide the polymer clay into small balls for shaping the scarabs. Roll each ball into a teardrop shape and use the craft knife (with adult supervision) to gently define the head and legs of the scarab. Using sandpaper (with adult supervision) smooth any rough edges. Create small holes in the back of each scarab with a toothpick before baking according to the clay’s instructions. Once baked and cooled, thread the scarabs onto string or yarn, alternating with other beads (optional) for a colorful necklace.

