Contact paper – that magical material that’s both transparent and adhesive – is a staple in any craft box for a reason. It’s a versatile, affordable, and mess-friendly way to keep little hands busy and unleash their inner artist.
This blog post dives into 20 contact paper crafts for kids, catering to various ages and interests.
From sensory play for toddlers to stunning suncatchers for older kids, you’ll find projects that spark imagination and ignite hours of crafting fun.
Getting Crafty with Contact Paper: Setting the Stage
Before we dive into crafting bliss, let’s gather our supplies! Here’s a basic list to get you started (specifics might vary depending on the project):
- Contact Paper: Choose clear or patterned options based on your project.
- Scissors: Child-safe scissors are a must for younger crafters.
- Art Supplies: Markers, crayons, or paint will allow for creative expression.
- Embellishments: Construction paper, tissue paper, feathers, buttons, pom poms – the possibilities are endless!
- Clear Tape (Optional): For added reinforcement in some projects.
Crafting with Contact Paper: Top Tips for Success
To ensure a smooth and enjoyable crafting experience, here are some helpful tips:
- Protect Your Surfaces: Lay down a tablecloth or newspaper to catch any stray paint or marker marks.
- Supervise Little Ones: Contact paper’s stickiness can be tricky for young children.
- Let Creativity Flow: The beauty of these crafts lies in sparking imagination. Encourage exploration and experimentation!
- Embrace the Mess: Sometimes, the messier the better (within reason, of course)!
20 Contact Paper Crafts for Kids Ideas to Ignite Creativity
Now, let’s get down to crafting! Here are 20 exciting projects to inspire you and your little Picassos:
For the Tiniest Crafters (Toddlers and Preschoolers):
Sticky Wall Gingerbread Man:
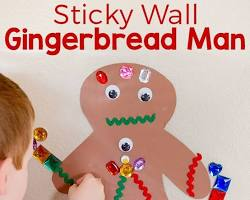
Cut out a gingerbread man shape from construction paper. Cover it with contact paper, sticky side out. Let your child decorate the “sticky wall” with buttons, pom poms, and other exciting textures.
Confetti Rain Sensory Bag:

Cut two squares of contact paper slightly larger than desired. Fill a Ziploc bag with colorful confetti pieces. Place the contact paper squares sticky sides together, trapping the confetti inside. Seal the Ziploc bag for a mesmerizing sensory experience.
Stick Flower Garden:
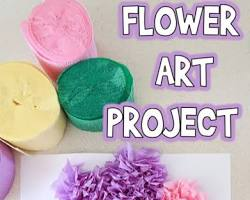
Cut out flower shapes from construction paper. Cover a tray with contact paper, sticky side up. Let your child stick crumpled tissue paper “flowers” all over the tray, creating a blooming masterpiece.
Shaving Cream Sensory Play:
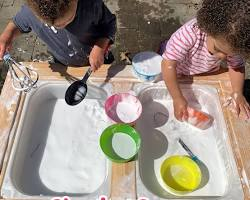
Spread shaving cream on a tray covered with contact paper, sticky side up. Let your child squish and explore the cool, slippery texture, engaging their tactile senses.
For the Creative Crew (Ages 5 and Up):
Easy Contact Paper Mandalas:
Draw mandala shapes on a piece of construction paper. Cover it with clear contact paper. Let your child decorate the mandala with colorful markers or paint pens, creating a vibrant and intricate design.
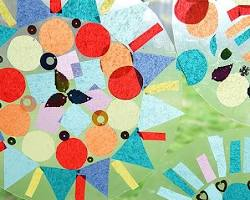
Stained Glass Windows:
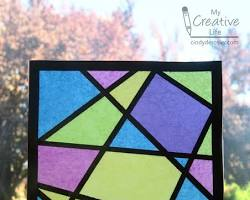
Cut out shapes from construction paper. Layer translucent tissue paper on top of the construction paper, creating a beautiful stained glass effect. Cover everything with clear contact paper for a window decoration that lets light dance through vibrant colors.
Pressed Flower Suncatchers:
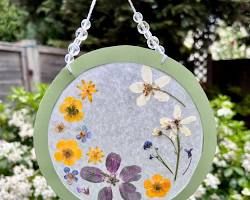
Collect and press beautiful flowers. Arrange them on a piece of contact paper, sticky side down. Cover with another piece of contact paper, trapping the flowers inside. Hang your suncatcher in a sunny window and watch the light illuminate the pressed flowers.
Confetti Bookmarks:
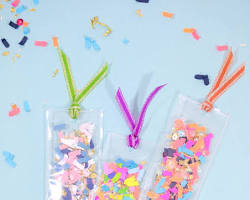
Cut out bookmark shapes from construction paper. Punch holes with a hole punch. Fill the holes with colorful confetti, adding a touch of whimsy. Cover everything with contact paper to create a sparkly, personalized bookmark that keeps track of reading adventures.
For the Little Artists (Ages 7 and Up):
Yarn Painting:
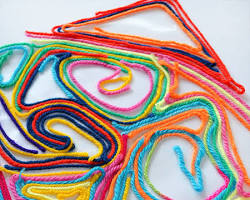
Cut out a design from construction paper. Place it under a sheet of contact paper, sticky side up. Let your child create yarn art by sticking yarn pieces directly onto the contact paper, weaving a colorful masterpiece.
Marbled Contact Paper Art:

Put a few drops of different colored paints on a shallow dish filled with water. Swirl the colors gently with a toothpick or straw to create a marbled pattern on the water’s surface. Carefully lay a sheet of contact paper on the water, letting the paint transfer. Peel off the contact paper and admire your marbled creation, perfect for crafting unique stationery or decorations.
Nature Collages:
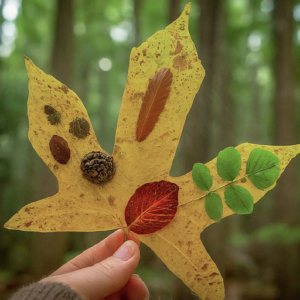
Take a walk and collect interesting leaves, twigs, and other natural treasures. Arrange them on a sheet of contact paper, sticky side up. Cover with another piece of contact paper to preserve your nature collage, creating a beautiful piece of artwork inspired by the outdoors.
Glow-in-the-Dark Play Scenes:
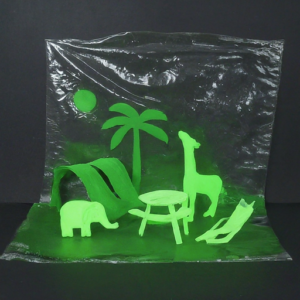
Cut out shapes from glow-in-the-dark construction paper. Create a play scene on a piece of black construction paper, letting your child’s imagination run wild. Cover everything with clear contact paper for a fun, glowy play scene that comes alive in the dark, perfect for bedtime storytelling or imaginative play.
For the Little Builders (Ages 7 and Up):
Marble Mazes:
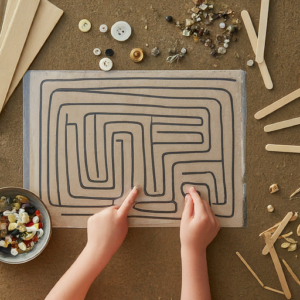
Draw a maze design on a piece of cardboard. Cover it with contact paper, sticky side up. Use craft sticks, buttons, or other small objects to create walls and obstacles within the maze, challenging your child’s problem-solving skills.
Lego City Play Mats:
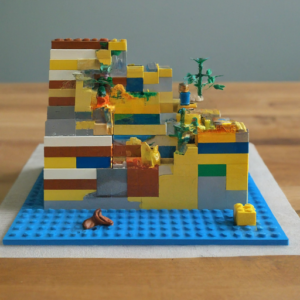
Cut out a baseplate-sized square of contact paper. Let your child build their Lego creations directly on the sticky surface! This keeps pieces organized and allows for easy transportation of their Lego city, preventing scattered bricks and lost building inspiration.
Paper Bag Puppets:
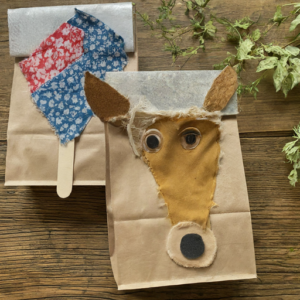
Decorate paper lunch bags with markers, crayons, or construction paper, bringing your child’s favorite characters to life. Cut out eye holes and attach popsicle sticks to the backs for handles. Use contact paper to adhere fabric scraps, buttons, or other embellishments for extra flair, creating unique and engaging puppets for dramatic play.
For the Science Enthusiasts (All Ages):
Magnifying Glass:
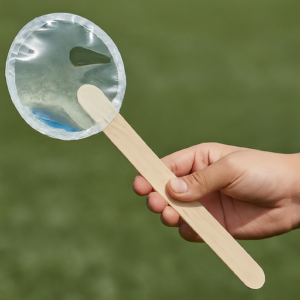
Cut out a circle from a magnifying sheet (found at craft stores). Attach a popsicle stick to the back with clear tape for a handle. Cover the magnifying sheet and popsicle stick connection point with contact paper for a simple, yet effective magnifying glass, sparking scientific curiosity.
Leaf Rubbings:
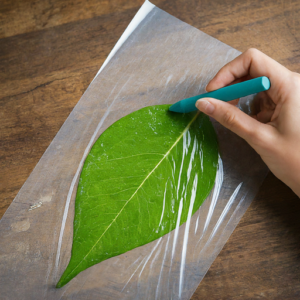
Place a leaf under a sheet of contact paper, sticky side up. Use crayons to rub over the leaf, transferring the texture and details of the leaf’s veins and surface onto the contact paper, creating a nature-inspired art piece.
Water Cycle in a Bag:
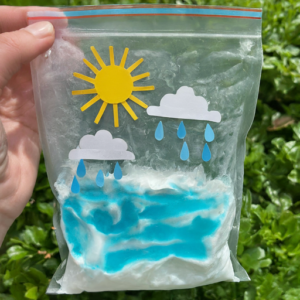
Draw the water cycle on a Ziploc bag. Decorate with cut-out raindrops, clouds, and a sun. Fill the bag with shaving cream for the clouds and blue dyed water for the ocean. Seal the bag and watch the “water cycle” in action as you squish the clouds, allowing your child to visualize this scientific process in a fun and interactive way.
For the Little Decorators (All Ages):
Contact Paper Lamp Shades:
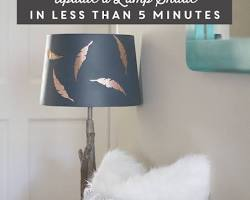
(Adult-supervised craft) Choose a lampshade that can be turned upside down. Cut out strips of contact paper and adhere them to the lampshade, sticky side out. Create a colorful, patterned design, transforming your lampshade and adding a personal touch to your child’s room.
Furniture Makeover:

Give old furniture a new lease on life! Cover tabletops, nightstands, or bookshelves with patterned contact paper for a quick and easy update. Let your child choose the patterns, allowing them to participate in decorating their space and expressing their creativity.
Bonus: Contact Paper Play for All Ages
- Sticky Window Art: Cover windows with clear contact paper, sticky side out. Let your child create a masterpiece with markers, crayons, or paint pens. This is easily washable and allows for endless artistic expression on a large canvas.
- Contact Paper Dress-Up: Cut out fun shapes from construction paper – superhero masks, animal ears, or anything your child’s imagination conjures. Attach them to clothes with contact paper for a temporary, yet creative, dress-up adventure, allowing for hours of imaginative play.
Remember, these are just springboards for creativity! Don’t be afraid to experiment, mix and match ideas, and let your child’s imagination soar. With a little bit of contact paper and a lot of fun, you’ve got the recipe for hours of engaging and creative bonding experiences!