Stained glass art has captivated people for centuries, with its vibrant colors and stunning light effects.
While traditional stained glass involves intricate cutting and soldering, there are plenty of fun and safe ways for kids to experience the magic!
This collection of 20 DIY Stainted Glass Crafts for Kids uses readily available materials and caters to a range of ages and abilities.
So, gather your little artists, unleash their creativity, and let the light shine through with these dazzling projects!
Easy Explorations (Ages 4-7):
Tissue Paper Suncatchers:
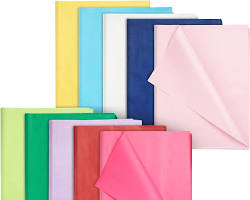
This classic is perfect for little hands. Simply cut out shapes from colorful tissue paper and adhere them to a clean contact paper sheet. Hang them in a sunny window and watch the room transform!
Coffee Filter Magic:

Coffee filters become beautiful canvases for toddlers! Dilute liquid watercolors and let your child drip or paint them onto the filter. Once dry, display them on a window or glue them onto construction paper for a framed masterpiece.
Melty Bead Mosaics:

Opt for translucent melty beads for a stained glass effect. Arrange them on a pegboard following a design or let your child create freely. Once ironed according to package instructions, these mini mosaics can be hung or displayed.
Washi Tape Wonders:

Washi tape comes in a vast array of colors and patterns, making it perfect for creating stained glass designs. Stick it onto clean windows or clear plastic sheets (like recycled takeout containers) for a vibrant and easily removable display.
Suncatcher Sandwiches:
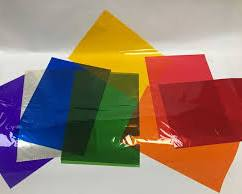
Layer colorful cellophane sheets between two clear contact paper sheets. Cut out shapes or let your child draw on the outside for a defined design. These layered “sandwiches” create a beautiful stained glass effect.
Creative Challenges (Ages 8-12):
Faux Stained Glass Cookies:
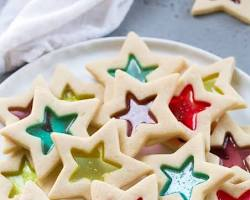
Who knew cookies could be considered stained glass art? Use hard candies in various colors to create beautiful mosaic patterns on rolled-out cookie dough. Bake according to recipe and enjoy the delicious (and translucent) results!
Liquid Watercolor Lanterns:

Upcycle empty glass jars into stunning lanterns. Paint the inside with vibrant liquid watercolors, let them dry completely, and then add a battery-operated tea light for a magical glow.
Geometric Gems:
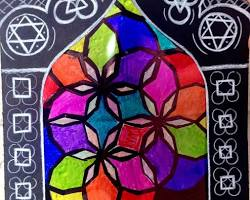
Explore geometric shapes with this project. Use cardstock or construction paper to create geometric shapes like squares, triangles, and hexagons. Decorate them with tissue paper squares or paint them with vibrant colors. Glue them together to form a larger “stained glass” artwork.
Fingerprint Fun:

This is a messy yet rewarding activity! Dilute some tempera paint with water and let your child create colorful “stained glass” designs using their fingerprints. Once dry, these unique pieces can be framed or displayed on a window.
Yarn and Contact Paper:

Craft beautiful yarn art with a stained glass twist! Create a design on a clear contact paper sheet using black yarn. Cut out tissue paper pieces and carefully tuck them under the yarn lines to create vibrant sections. Display your yarn masterpiece on a window.
Stepping it Up (Ages 12+):
Sharpie Stained Glass:
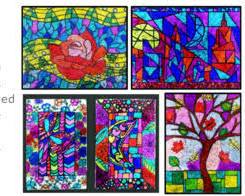
This project uses permanent markers to create stunning faux stained glass effects. Draw intricate designs on clear plastic sheets (like recycled report covers) using Sharpies. Spray a light coat of clear gloss polyurethane to protect the artwork and enhance the stained-glass look.
Food Coloring Frenzy:

Recreate the look of traditional stained glass with this clever hack. Draw a design on a clear plastic sheet (like overhead projector sheets). Fill the sections with diluted food coloring and let them dry completely. This technique allows for beautiful color blending and intricate details.
Mod Podge Marvels:
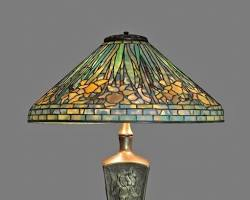
This project takes inspiration from the Tiffany lamp style. Cut out various shapes from colored tissue paper. Glue them onto a clear plastic sheet (like shower curtain liner) using Mod Podge. Layer the tissue paper to create depth and dimension. Once dry, add a black outline using a paint marker for a classic stained glass look.
Salt Dough Stained Glass:

This unique approach uses salt dough as a base. Mix flour, salt, and water to create a moldable dough. Roll it out and cut out shapes. Decorate the shapes with tissue paper pieces or paint them with vibrant colors. Bake according to recipe and display your stained glass-inspired salt dough creations.
String Art Sparkle:
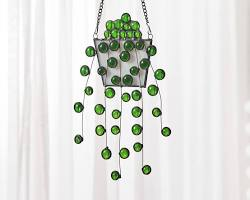
Combine string art with the beauty of stained glass. Hammer nails into a wooden board following a design. Wrap colorful embroidery floss or yarn around the nails to create vibrant sections.
Bonus Projects:
Nature’s Stained Glass:
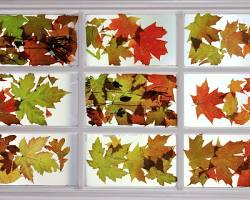
Take a walk in nature and collect colorful leaves, petals, and other interesting finds. Press them flat and arrange them between two pieces of clear contact paper to create a one-of-a-kind stained glass collage. Hang it in a sunny window and enjoy the natural beauty!
Shrinky Dink Stained Glass:
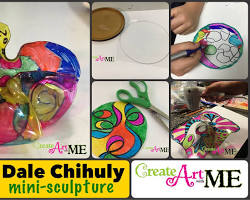
Turn Shrinky Dinks into miniature stained glass masterpieces! Color Shrinky Dink sheets with permanent markers following a design. Cut out shapes and bake according to package instructions. Once shrunk, they become tiny stained glass pieces that can be strung together as mobiles or keychains.
Glow-in-the-Dark Delight:
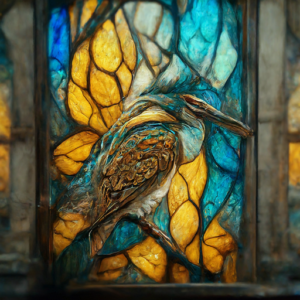
Add an extra element of magic with glow-in-the-dark paints. Create stained glass designs on clear plastic sheets using a combination of regular and glow-in-the-dark paints. Once dry, these pieces will transform when the lights go out, creating a dazzling nighttime display.
Recycled CD Canvas:

Give old CDs a new life! Cover the shiny side of a CD with black paint or marker. Once dry, use a craft knife (with adult supervision) to carefully scratch out stained glass-like designs on the painted surface. Hang them in a sunny window and watch the light dance through the scratched patterns.
Cardboard Creations:
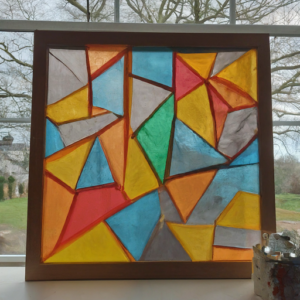
Cardboard boxes become the perfect base for larger stained glass projects. Cut out geometric shapes or animal silhouettes from cardboard. Decorate them with colorful tissue paper, paint, or even yarn. Glue them together to form a stained glass window display or a 3D stained glass sculpture.
Safety Tips:
- Always supervise young children during crafting activities, especially those involving sharp objects like scissors or craft knives.
- Use age-appropriate materials. Opt for washable paints and blunt-tipped scissors for younger children.
- For projects involving food coloring or glue, ensure children do not ingest them.
- When using hot glue guns, adults should handle the tool and supervise children closely.
Let the Creativity Shine!
These DIY stained glass crafts for kids offer a multitude of ways to explore color, design, and the magic of light. With a little creativity and readily available materials, you can create lasting memories and foster artistic expression in your little ones.
So, gather your supplies, unleash your imagination, and let the light shine through with these dazzling projects!

